Water Slide Review at the Atlantis Resort in the Bahamas!

The Atlantis Resort, Paradise Island, the Bahamas

In September 2012, I spent 3 days at the famous Paradise Island, Atlantis Resort in the Bahamas.  This is a unique hotel resort experience because it consists not only of the lavishness commonly found in this type of setting with stunning rooms, amenities, beaches, restaurants, and views; however, the Atlantis Resort stands out among its peers due to the fact that it also includes an extensive aquatic theme park which is included within the price of the stay of the hotel.  20 million gallons of water, 141 acres, 11 pools, 8 waterslides and 2 river tubing rides alongside aquarium glass tunnels, open lagoons filled with animals, and floor to ceiling windows featuring Reef Sharks, Manta Rays, Nassau Groupers, Jelly Fish, Lobster, and one of the most famous Bahamian animals the Conch!

From all of the countless features of this resort, I decided to focus on the Aquaventures water park.   And being the funny girl I am – strangely attracted to the thrilling, but ultimately satisfied with easy-going rides, here are my personal insights into each waterslide!

There are 2 areas in the Aquaventure water park with each section being home to 4 different waterslides.  To access the waterslides, you will need to find a Towel Hut and swipe your room key, so they can give you a bracelet.  My best advice, with regards to any pre-waterslide preparation, is to leave all money, watches, jewellery and anything of value in your room, otherwise you will have no choice but to leave it on a poolside lounger or rent a locker for a minimum of 7USD/day while you romp and play in the water.

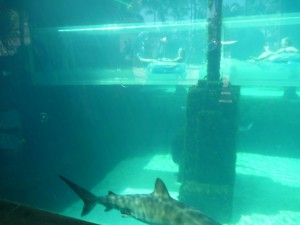
Cool tunnel at the end of The Serpent waterslide

The first water playground we encountered was at The Mayan Temple.  There you will find 4 fun waterslides, one of which (and my personal favourite), requires a tube that you get prior to climbing the stairs to the top.  The Serpent takes you through an enclosed chute, first into darkness, then from side to side and finally down through a transparent tube.  The coolest part is that it runs straight through a huge aquarium full of sharks you can see from the safety of the ride and then tosses you out on the other side!  Fun!


The other 2 slides at the top of The Mayan Temple are for true thrill seekers.  You can choose between the super speedy 60 foot drop at a virtual 90 degree angle down on The Leap of Faith or The Challenger, which you and your friend can race down side by side to see who goes the fastest or the farthest with a heart-stirring bounce part way through!  Both are open air slides.

The other slide on The Mayan Temple is called The Jungle and I would call a more traditional style of slide.  It is open air and swishes you from side to side through mountainous terrain and drops you into a lovely pool of water.  This would be the tamer of the four slides, but still ignites a squeal of laughter or two along the way!

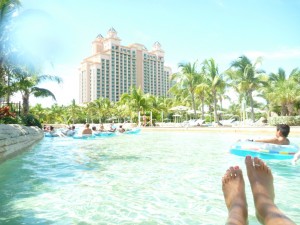
The Current river tubing ride

After The Mayan Temple why not make your way over towards The Power Tower, which is home to a great mile long tube ride called The Current.  The highlight of this river ride would definitely be the waves that rush you along as well as the route towards the end (stay to the left!) called “The Rapids”, which tumble and spin you every which way.  If you veer to the right instead, you will get the opportunity to do one of 2 super fun water slides with your tube, either The Drop or The Falls.  You will be directed onto a big elevator that will click clack your way to the top.  I tried The Drop and enjoyed the thrilling plummet and butterflies as I was sloshed about the tunnel!

The most exciting, thrilling, and scary waterslide, in my opinion, is atop The Power Tower and called The Abyss!  Even just climbing to the top is worth the 360 degree view of the ocean and resort, but don’t be surprised (or deterred!) if you hear both men and women scream as they drop down the dark tunnel.  Because the drop straight down at top speed with rushing water beneath you couldn’t be intense enough, why not ensure you are surrounded by pitch blackness!   Eeeek!  However, my favourite part of The Abyss is the ending (oddly enough) when it spits you out into a cave with 2 beautiful aquariums built into the walls – very cool!  Now, for a different kind of thrill, take a tube all the way back to the top of The Power Tower and enjoy a wild outdoor drop down The Surge and then twisty-swirly fun through rapids along the way!  Make sure you do what they tell you and don’t drag your bum and watch your toes as your tube gets bounced around!

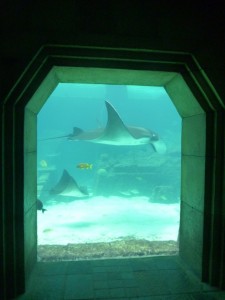
The Dig

If waterslides are not your calling, I would like to highly recommend a fascinating presentation of the mythical civilization called Atlantis that, according to Plato, was destroyed by earthquakes and a tidal wave and rests below the surface of the ocean some 11 000 years ago!  Leisurely stroll through The Dig and enjoy this stunning aquarium; view the giant Manta Rays gracefully “fly” by or admire the striking Spotted Eagle Rays with their unique expressions and impressive formations.  You will also never forget the extraordinary Green Morays mouthing underwater words to you, the scrawling Lobster tank, and magnificent swimming Sea Horses and more!

All in all, I had a great time exploring even just a fraction of what Atlantis has to offer.  The only thing I found challenging was affordable eating and drinking options since the resort is not, in fact, a traditional all-inclusive.  You can make use of the convenience store across the street to purchase things like water, snacks, and alcoholic beverages to help with this.

I thoroughly enjoyed the Atlantis Aquaventure water park and all of its amazing animal creatures.  This is well worth a fun-filled day pass and a cool add-on feature at a luxury resort!

In front of the Beach Towers and Green Turtle pond

Part 2 – Equalizing Your Ears: Let’s Get Popping!

In my introductory post, I explained, in basic terms, what happens to Air when you go beneath the surface of water and in Part 1 I talked about buoyancy and the relationship between Air and the BCD.  In this post, I will describe the part that Air plays on our Ears and Sinuses and how we adjust our bodies to that with some super tips to help you in one of the most common challenges as new divers!

Even if you don’t know anything about scuba diving, there is a general understanding that something happens to our ears when you dive down deep and similarly when we’re on an airplane.  Many people even feel afraid to give scuba diving a try because of some discomfort they felt while free-diving.  Sometimes they think that the discomfort will be worse while scuba diving because typically it’s deeper than free-diving, but this is not necessarily true!

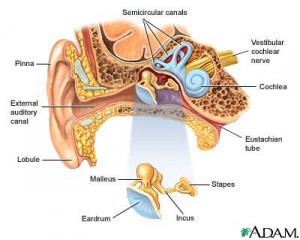
Ear Diagram

Ear Diagram

Let me first explain a little about our Ears and Sinuses… There are tubes leading from our ears and sinuses to our throats and they are filled with air.  As soon as you go underwater, our bodies feel the pressure and the weight of the water on these spaces as the air inside them becomes “smaller” (read my intro for more info on why air becomes “smaller” underwater).  The tubes are squeezed together by the pressure and the result is discomfort.  Our goal is to maintain a normal amount of air inside this airspace and push open the tubes, so we “equalize” it to the surrounding (“ambient” pressure for each depth).  We do this as soon as we go underwater and every 1m/3ft before any discomfort is felt.

It’s so easy to prevent any discomfort simply by pushing air into those spaces as you go down and we do that in 3 common ways:
1. Take a breath in through your mouth, plug your nose with your mouth now closed, and then try to breathe out your nose (while it is plugged).  This will push the air from your lungs into the ear tubes and sinuses instead of out your mouth/nose where they normally go.  Your Ear and Sinus air spaces open up!
2. Swallow and wiggle your jaw.  You can tilt your head from side to side and try to stretch your neck to try to help your body in letting the air get inside those tubes and air spaces.
3.  Do #1 while doing #2!

It’s also important to note that, as we talked about in the previous posts, not only does air change when you go down↓, but it will change when you go up↑.  You will remember that, as you swim up, you must manually release air from your BCD to adjust for the expanding air; however, with our Ears and Sinuses, we are lucky in that our bodies will release the expanding air naturally for us.  There is nothing you need to do with your Ears and Sinuses upon ascent.

So, just before I go into my tips, I want to point out a main difference I’ve noticed between free-diving and scuba diving with regards to equalizing your ears.  Many people (including myself) feel discomfort while free-diving because the descent tends to be very rapid – you’re holding your breath after all!  Whereas, with scuba diving a typical descent is slow and controlled, so you have the time to “clear” even the most sensitive of ears before ever feeling any discomfort.  Just like anything else with diving, it does take practice, so make sure you take your time!

Mia’s Helpful Tips!
1.    Prevention. Remember – equalizing is a preventative measure.  It’s a common misconception that you should wait until you feel discomfort and then try to equalize.  Don’t Wait!!
2.    Having Difficulty. Don’t push too hard!  The tissues inside your ears and sinuses are very delicate.  If you are having difficulty equalizing, ascend up 1m/3ft where the pressure is less and try again.
3.    Cold and Allergies. If you have a cold or allergies, the tubes and sinus air spaces will be swollen and filled with mucous (fluids).  You won’t be able to push air into these areas sufficiently OR the air that does get in may not be able to get out upon ascent.  As you swim up, it will expand inside the tubes and sinuses resulting in much pain called a Reverse Block and possibly permanently damaging these delicate tissues.  Try snorkeling on days that you have a cold/allergies!  Sometimes the salt water is just as good as a nasal spray with saline solution to get those boogies out!
4.    Changing depth. Remember – equalizing is not limited to your first descent along a line.  As you follow a sloping bottom, don’t forget to continue to equalize.  You will always need to adjust the amount of air inside those spaces depending on whichever depth you go to.
5.    Ear Plugs. If your ears are prone to infection, you may be using ear plugs.  My preferred ones are Doc’s Pro Plugs.  Make sure you purchase the ones with a pin hole so air is able to escape upon your ascent!
6.      Cleaning. I usually use a half and half mixture of alcohol and vinegar after I’ve been in the water.  The alcohol dries out all those little crevices in your ear that are prone to infection and the vinegar gives it all a good clean (and you get to smell like fish and chips – Yum!)

As you may be aware, I began this 5 part series with a goal of addressing some common queries I get from various dive students as well as certified divers.  While everyone receives the same training from PADI around the world, a lot of the practical tidbits of useful information are shared pre and post-dive on the boat or over a beer at the end of the day.  I know for me when I first started out diving, I only had the chance to dive maybe twice a year if I was lucky, so my learning curve was slow.  I’m hoping that these blogs will be able to provide some additional insights my divers can refer back to.  I hope you enjoy and feel free to let me know what you think via my DiveWithMia Facebook page or click on Contact Mia!

DiveWithMia – PADI Scuba Dive Skills, Experience, and Passion for Life!

Part 1 – BCD Air Inflation/Deflation and Buoyancy: A Balancing Act!

If you haven’t already done so, take a look at my introduction to Understanding Air and its Relationship to 5 Key Areas to Scuba Diving prior to reading this post to give yourself some quick and helpful background information!  In this post I will discuss the BCD, its correlation with air, some helpful tips, and then my personal equipment recommendation.  If you enjoy this article – let me know and stay tuned for the next 4 posts on how Air relates to Ears, Mask, Tank & Octopus, and your Lungs & Breathing!

The first specific area I’d like to talk about is the BCD or Buoyancy Control Device.  Divers wear this piece of equipment, which contains a bladder to hold air, like a jacket or vest.   Your BCD is connected to the air in your tank via the “Low Pressure Inflator Hose”.  It is also equipped to be “orally inflated” should there be a problem with the mechanism to add air from the tank.  You do this by blowing into the hose while holding down the deflate button (which opens the valve to allow air in/out).

Before you jump in the water you always make sure your BCD is partially inflated so that you can float on the surface.  When you are ready to go underwater you raise the Low Pressure Inflator Hose high above your head and release all the air from the BCD and exhale slowly, which also releases air from your lungs to assist in your descent.  As you come close to the bottom or the depth that you want to stay at, you will usually need to add some air into the BCD to prevent you from continuing down or hitting the bottom.

This tends to take a few dives as you learn the balancing act of how much air will maintain your general position at a certain depth.  Remember, the air that is put into your BCD is also affected by the pressure and becomes increasingly more (and less!!) dense depending on your depth.  That means that the amount of air you need to maintain neutral (neither sinking nor floating) buoyancy at 10m/32ft will be different than what you put in at 23m/75ft, for example.  This also means that when you change your depth by swimming over a reef or to a shallower depth, you must make adjustments to the amount of air inside the BCD by releasing air – even if you didn’t add any more air to it!!

This happens because just as going deeper causes the air to be more dense, ascending (even just a metre or 3 feet) will cause the air to expand and make your BCD fuller causing you to float upwards  until you release the air, which results in a balance of just enough air inside the BCD to achieve neutral buoyancy at that specific depth.  This is a kind of balancing act that at first takes some thought and will later become second nature to you.  Remember this important point – Upon ascent, consider that the air already inside your BCD will expand, so pay attention to your positioning and if you begin to float upwards.  Be prepared to release the air to balance it out and to avoid an uncontrolled ascent.

Mia’s helpful tips!
1.    Before diving and during your pre-dive equipment check, with the air turned on, practice putting air into the BCD and taking it out (inflate and deflate).  Sometimes it can be confusing when using rental gear on which button is which.  You can also practice orally inflating.
2.    While underwater, if you are trying to locate your Low Pressure Inflator Hose to inflate/deflate, always remember:  “If I touch my LEFT BOOB, I will find it!!!”  Anyone want to admit to trying to deflate their snorkel at some point of their diving career!!!???
3.    Having trouble deflating?  Air will always stay at the highest point as it rises.  If you are in a horizontal position, slightly head-first, that means the air could be sitting in the bottom part of your BCD as your bum will be higher than your shoulders.  Try to make it easy for the air to escape from your Inflator Hose by:
a.    Always raise the hose as high above your head as possible.
b.    Sometimes you can even adjust your positioning in the water from horizontal to momentarily vertical to further assist the escape of air from the Inflator hose as you reach up.

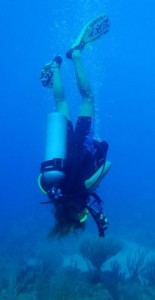
Mia Diving Upside Down

In a head-first position, use a dump valve to release air

c.    If for some reason you are head-first and your fins are high above you, this means any air in your BCD will actually be in the bottom of your jacket.  Most BCDs come with a “Dump valve” to release air from a head-first position underwater.  Feel around the bottom edge of your BCD for the cord and a little tug should allow a burst of air to escape.
4.    Little by Little!  Try to avoid the up and down ping-pong effect by thoughtfully inflating/deflating only a little, waiting for a result and then repeating as necessary.  As a beginner diver learning this fancy balancing act called buoyancy, stay calm if you feel yourself floating up upon ascent.  Remember to exhale completely as you release just a puff of air.  Many divers have felt a quick twinge of panic at floating up and proceed to do a big dump of air causing them to drop back down, but too quickly and beyond their intended neutral zone into a “negative buoyancy” (sinking).  This results in more fiddling of inflating again to achieve the comfortable hovering position.
5.    Make a commitment to get to know yourself!  Adding air to your BCD is not something you should typically be doing throughout the entire dive.  Remember that your buoyancy is not only controlled by your BCD, but ALSO by your breathing.  Make a commitment that on each dive once you achieve neutral buoyancy (neither sinking, nor floating) at a depth you will stay at for awhile, practice using your breathing to adjust your position in the water.  Refer to the post on your Lungs & Breathing blog to come in a few weeks!  Buoyancy is something that you will practice over and over again and WILL get!  Have patience, get familiar with your BCD and enjoy!

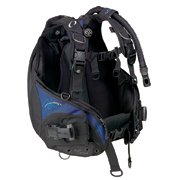
Mia BCD Oceanic Hera

Mia's favourite BCD - the Oceanic Hera

Mia’s BCD Recommendation!

The BCD I use now and absolutely love is called the “Hera” by Oceanic and created specifically for women.  It is both a jacket style and rear inflation form, which I love because I am stable in both horizontal and vertical positioning without back weights (although pockets for back weights are available if I want).  It also has a ton of sturdy D rings to attach my Alternate Air Source and attach my Surface Marker Buoy alongside big pockets to store a slate or some yucky plastic bottle I find underwater and want to put in the trash.  Before the “Hera” I used the Seaquest “Diva” for many years and loved, but I decided against the newer version of this due to my desire to leave rear-inflation styled BCDs and the lack of pockets and D-rings.  Sorry Diva you were good, but time to move on!

Feel free to send me a message via Contact Mia if you have any questions regarding this topic.  If you “Like” it make sure you let me know on my Facebook page DiveWithMia!

Happy Diving!

DiveWithMia.com


Understanding Air and its Relationship to 5 key areas in Scuba Diving

Air was a topic that I had wanted to write about for some time now as it seemed to be the common theme when discussing buoyancy, equalization, air consumption, safety and more; but, as I started writing I kept branching out on the topic and ended up with a super long blog!  Soon I realized and quickly decided that my topic had evolved into a 5 part series!  So, I am excited to present this blog as the introduction piece to this series and the topic that I am going to zero in on is all about Air and the impact that the underwater world has on that; Afterwards, I will go into more detail on 5 more specific areas of diving that all have important relationships with Air:  the BCD, our Ears, our Mask, the Tank & Octopus, and finally our Lungs & Breathing.


Some of the ins and outs of diving and air include a wee bit of background knowledge of a basic scientific principle.  Considering science and math have never held my interest for too long, I remember over 10 years ago when I did my Open Water training, I really brushed over these topics with a passing score yet not fully understanding the key concepts.  Now that I am an Instructor I see students struggling in the same way I did and I hope that I can offer some advice I wish an Instructor could have provided me earlier on!
So here goes for my little scientific introduction to air and diving…
As we all know, water has weight (when you pick up a bucket of water – it’s heavy!).  That means, when you go underwater there is a lot of weight on you; this is otherwise known as “Pressure”.  We are lucky though because the weight of water doesn’t have any effect on similarly composed liquids like the makeup of our body, so we can swim freely below the surface without feeling the weight of water on our bodies.  However, this weight does affect “Air Spaces”.  Air is made up of many molecules that are spread out all around us on the surface.  Underwater, air can be found inside our Buoyancy Control Devices (BCD), in our ear and sinus spaces, inside the mask, and in our lungs (of course!).  As you go underwater, the air molecules will get closer and closer together in each of these areas (air becomes “Dense”).
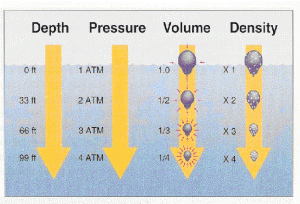
If you look at the Density arrow in the picture below, you will see that on the surface, Air Density = 1x and at 30m/99ft, Air Density = 4x.  That means, for example, that if you compare a breath you take on the surface to a breath you take at 30m/99ft, you would, in fact, be taking in 4x the amount of air you would breathe on the surface.  In addition, consider that as you ascend from your dive, that air becomes less dense and will naturally expand in the air spaces found in your BCD, ears/sinuses, mask, and even your lungs if you hold your breath!  It is quite a simple principle that is very helpful (and extremely important!) for you to practice fun, enjoyable and safe diving experiences.

Click here to read my next blog which will be about how Air and your BCD interact, including tips and equipment recommendations from DiveWithMia!

air-under-pressure

This is a good picture of what happens to air as you scuba dive underwater.

Results from the Sosua Bay Lionfish Hunt, March 4, 2012

What an incredible day for diving as the sun shone all day, the ocean remained calm and visibility reached 100ft!

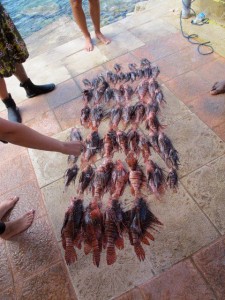
With a total of 3 teams competing (Diwa – Rayo; Superior; Northern Coast), a total of 3300RD (84USD) was raised and distributed between the 2 teams who caught the MOST Lionfish and the BIGGEST Lionfish, a grand total of 100 Lionfish were caught and the biggest being 16 inches (412mm).  Everyone enjoyed a friendly competition and a delicious Lionfish dinner courtesy of Carlos at Coco’s bar in Sosua Bay parking area  (Sosua Bay Lionfish Hunt Poster).

MOST Lionfish caught:
Superior Dive – Wendy, Paul, Alberto, and Mia
75 Lionfish caught (Paul catching the most at one time – 18 on a two tank dive)
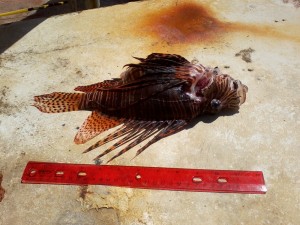
Biggest – 16 inches (406mm)
Dive Sites – Between Charamicos beach – Pyramids – 5 Rocks and Coral Garden wall

BIGGEST Lionfish caught:
Northern Coast – Jan, Keith, Claude, Jukka
22 Lionfish caught
Biggest – 16.25 inches (412mm)
Dive Sites – Pyramids – Farthest end of Airport Wall (where biggest was found and caught by Keith)

Special mention to:
Team Rayo (Diwa) – ChiChi and Jorge
3 Lionfish caught
BEST Team spirit!!!!

The raffle prize winners included:
500RD @ Jolly Rogers – Domingo
100RD @ Donovan’s – Chuck and Jan
Northern Coast caps – Carlos and Wendy
Northern Coast t-shirts – Amelio, Francisco (Chinwin), Keith, and Geoff
Superior Dive t-shirts – Robinson, Arturo, and Tomas
THANK-YOU SO MUCH TO our Sponsors!!!

I want to say a very special thank-you to everyone who contributed and participated including our beloved capitans – Domingo, Amelio, and Tomas and for ALL the help in filleting all 100 Lionfish (25lbs of meat!) by Paul, Caquito, and Arturo!  We couldn’t have done it without you!

A very inspiring day, indeed, as we worked together to address the problem of the over-populating Lionfish in this region.  Click here for more information and research regarding the problem.

We look forward to our next collaboration and contribution, which will be an underwater beach clean-up!

first-scoring-sosua-bay-lionfish-hunt-dominican republic

First Scoring of the Sosua Bay Lionfish Hunt - 52 Lionfish!

Lionfish Hunting

Today was a hunting day.  I had been an observer for over a year now and a helper a few times, but this time was different – this time I had my own spear gun and I was diving only for me.  Before the dive I felt a heightened buzz, which was a result of the anticipation for embarking on something unknown.    In addition to the usual considerations when diving, such as my depth, no decompression time limit, actual bottom time and air consumption, now I will be on a mission to also discover, uncover and target the invasive Lionfish species not native to the Atlantic ocean where I dive.  I will need to travel underwater with spear and catch bag in hand taking into account my position in the water in relation to those items and any other divers and sub aquatic plants and animals.  I was so excited!

Descending along the line at the dive site “Tunnels” along the Airport Wall, I adjusted myself so I was in a comfortable and streamlined position and began to swim hard!  I knew there was a bit of a swim in 70-80ft of water towards the cliff overhangs, swim throughs, and crevices where I knew we would locate our targets.  Sure enough, our hopes were realized.  Ensuring the safety on the gun, I loaded the spear gun with two hands pulling the rubber band while holding the butt against the cummerbund of my BCD.  I released the safety and took careful aim while controlling my position in the water with precise breathing.  I pulled the trigger and scored my goal!  The bag that I borrowed is ideal for holding my catch as it has a spring handle.  With one hand I can open the bag, put the Lionfish, who is still on my spear, into the bag, close the bag and draw out my spear leaving the fish safely inside.  By tying a long rope and a small bottle to the bag, it can easily be towed behind me staying above the bottom of the ocean and avoiding any contact with me as I swim.

Paul, who was also Lionfish hunting, snared one himself only to entice an insistent Spotted Moray Eel out for lunch.  This whole component of how the bionetwork functions is so curious to me!  How is it that the eel only hunts the Lionfish once the Lionfish has been injured?   How is he not stung by the Lionfish’s venomous spines?  Either way, it certainly puts on a live National Geographic type performance for us divers as the eel gobbles the Lionfish up in one bite!

Looking forward to the Lionfish Hunt this coming Sunday!

Lionfish-Sosua

Invasive Species Lionfish caught in Sosua, DR

Claustrophobia vs. Freedom

Time and time again, when people discover I am a scuba dive instructor, many respond with “Oh, I would love to try it, but I am claustrophobic”.  For many who haven’t experienced it, scuba diving instills a feeling that they are trapped, confined and restricted.  They see diving as being trapped under so many feet of water and confined behind their mask and their movements restricted.  Diving is a sport that is fundamentally psychological where your mind is actively involved in all the physical components as well.

For me, as soon as I enter the water and begin to descend below the surface, air slowly being released from my lungs in the form of bubbles, I am embraced by a gentle sense of peace.  Movements are slow underwater and the hectic sounds of the day are removed and engulfed by my everlasting companion, the water.  Even when the ocean is rough and seems to be pushing me around, I give myself to him and trust my experience and instinct to move with him and vow not to fight him and the encounter is always better below the surface.

At the bottom of the ocean, hovering just above the sea bottom, a new and fascinating world is exposed.  Colours that don’t exist on the surface with animals seemingly hand-painted by some concealed artist flick in and out of coral crevices oblivious to my unseemly presence.  In pairs, butterfly fish dart over the reef in a life they will live together forever.  Opposite to feeling entrapped, a sense of freedom is unleashed upon me as I glide through a medium others believe to be inhibiting.  Drifting through water is what I imagine a bird feels like who soars through the sky, but only slower and more meditative.

When you learn to dive, for many, there can be overwhelming feelings of excitement, apprehension, exhilaration and even downright fear.  Not to mention, there tends to be an added dose of adrenaline thrown into the mix.  These can be alleviated significantly when you take your dive training with someone you trust and who is attentive to your learning.  The more you dive, the more tranquil the experience will be and the trust that, in the beginning, you give to your instructor or guide becomes the trust you have in yourself.


canyon-diving-dominican-republic-sosua

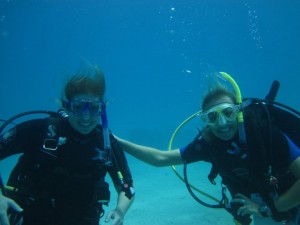
Judy and Mia at Canyon