How did I get here? Part 2 – The Indirect and Complicated Route to PADI Discover Scuba Diving in The Philippines

Last week, inspired by some people asking me about my life and how I ended up where I am today, I posted my initial feature entitled:  How did I get here?  The Indirect and Complicated Route to Scuba Diving Happiness – Part 1.   At the moment, I am spending time in the Turks and Caicos Islands while starting my own Truli Wetsuits business in Canada and almost every time I meet a tourist, they ask:  ”So, how did you end up in Turks and Caicos?”  There is a simple answer (I accepted a job offer as Purser on the scuba liveaboard Turks and Caicos Explorer II), but there’s also a way more interesting and convoluted answer which I’m having a lot of fun writing about.  In my last post, I ended with me taking a job as an English Teacher in Tokyo, Japan upon graduating from university in Canada and now I will continue to tell my story of finding a way to try scuba diving and adventure on my first backpacker’s trip to The Philippines…

Now that I was unleashed on the big wide world as a Truli independent adult, I was determined to follow my passions and do what I had always wanted to do.  1.  I wanted to travel and explore.  2.  I wanted to try scuba diving.  After working 6 months at the language school I was entitled to some vacation days.  All the teachers would talk about their amazing adventures in Thailand and rave about the lovely culture, food, and fantastic shopping, but I didn’t want to do what everyone else was doing already.  There was this free magazine for foreigners in Tokyo and there was a page that advertised all of the prices for travel and I noticed that the Philippines was pretty much the same airfare as Thailand.  I decided I wanted to go to the Philippines.  I went to the international bookstore and bought the Lonely Planet guidebook to the Philippines as well as  the Frommer’s guide to South East Asia and started to study where was the best place to go scuba diving.  Although the most famous places for scuba diving were advertised as Cebu Island and Boracay, I fell in love when I read about the island of Palawan in the south west side of the country.  The guide book described this place as “The Last Frontier”.  I booked my flight from Tokyo to Manila and then straight to Puerto Princesa on Palawan and back.  I was feeling pretty nervous about this big adventure all on my own, but it was what I had always wanted and I felt like I finally had the opportunity to do something amazing and bold and I did not want to let that pass me by.  But luckily for me, I think my enthusiasm inspired some excitement in my co-worker because just at the last minute she decided to join me on my trip!  I was stoked!

People had warned me about Manila being super dangerous and I was quite anxious considering I didn’t really know what I was doing.  I had booked one night in a little hostel near the airport before we flew the next day to the island, but we needed to call and confirm when we got there.  But neither of us had any money or coins for the phone.  We were standing by the phone trying to figure out what to do when a man who looked like he was in the military (they were all over the airport) and with a very large gun walked over to us.  He generously offered us his phone card so we could use the phone.  This was the first of hundreds of positive cross cultural encounters I would make in my life.  Although I was still on edge of my new surroundings, the kindness of the “scary” stranger breathed some life and confidence into me as we hopped into a taxi to head to the hotel.

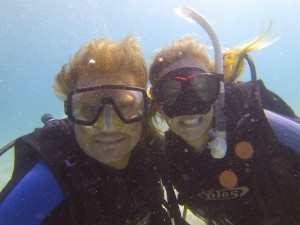
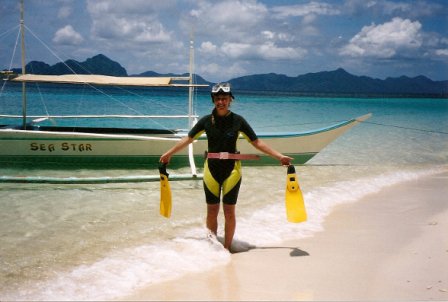
That's Mia snorkelling for the first time off a boat in The Philippines!

Palawan, The Philippines

Over the next week we took a Jeepney across the island, which fell off the road at one point.  We paid some local guys to travel even further up island by water.  They caught us some fish and put us up in a hut on a deserted island with no electricity.  But more importantly, they lent me a scuba mask.  This was the first time in my life that I swam in an ocean and looked beneath the surface to see the colourful wildlife below.  I remember being absolutely enthralled.  It’s interesting to think back to that moment and wonder if it relates to how much I love introducing people to scuba diving.  I love that I am the one that gives others the opportunity to see all the amazing things below the surface of water.

Our final destination was El Nido, which is on the northern tip of Palawan.  We arrived by boat and I faintly remember a light drizzle with rainbows as we arrived with a back drop of tall craggy cliffs jutting out of the ocean amongst the multitude of blue hues of the sea.  We immediately signed up for a PADI Discover Scuba Diving course for first thing the next day.  I was so elated that not only was I going to get to try scuba diving, but it was going to happen in this exotic little village in the South Pacific!  The next morning we went to the dive shop and travelled by boat to a secluded white sandy beach on some island.  There were three of us girls and one instructor.  Besides my friend and I, the other woman was a Filipino from Manila who, much to my surprise, had never tried scuba diving.  She told us her brothers were all instructors and she loved the water, but just never had the chance to go.  I could totally relate, but couldn’t believe with all the beautiful waters that surround her country that she could wait

That wetsuit is exactly the reason I decided to design my own Truli Wetsuit line!

El Nido, Palawan, The Philippines

so long!  Our instructor made us some lunch and then briefed us on the skills and dive we were about to do.  We walked across the white sandy beach and into the ocean to do our “pool skills” and then we swam off together!  I felt like a natural and was so excited to see a black and white sea snake!  It looked so amazing as it slithered through the water column.  I don’t think in all the diving I’ve done since then that I’ve seen anything like that again.  So that was the day that opened a whole new world to me and started a journey that has taken me to where I am today!

We desperately wanted to stay longer in the village and do more scuba diving, but alas, I had very responsibly booked a return flight from the town all the way at the southern end of the island and needed another day of travel to get back there, so off we went.  As soon as we got back to Tokyo, I was on a mission to figure out how to become a certified PADI Open Water diver as soon as possible, which you can read about in my next blog post!

How did I get here? Part 1 – The Indirect and Complicated Route to Scuba Diving Happiness

I went out for a drink last week with some people who we had become friends with over on Long Bay Beach on Providenciales, Turks and Caicos Islands.  We

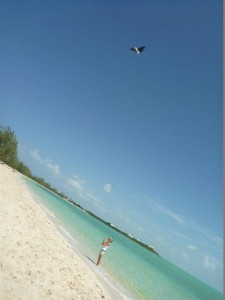
Long Bay Beach, Provo, Turks and Caicos Islands

Long Bay Beach, Provo, Turks and Caicos Islands

spend a large portion of our days over there escaping the relentless heat of our non-air conditioned house in the heat of July in the Caribbean.  There you can always find some relief from the heat via the wind or a dip in the ocean.  It’s only a 1 minute drive away.  The beach has become famous for kiteboarding and most tourists visit at least once, fall in love with the soft sand, shallow calm waters, and decide to return again and again.  After some casual chats about life on the island and about the Truli Wetsuits business I am starting up, this tourist began to probe me with questions about how I got to be where I was today.  I realized that I have answered those questions quite a few times over the years and as time passes the stories seem to get more and more interesting.  Life is not a smooth ride, but my determination to combine work with my passions has taken me all over the world and has challenged me in ways I never thought possible.  I’m addicted to those challenges!  And so it began…

Did you ever want something as a child that you weren’t able to have that followed you into adulthood?  That was how scuba diving was with me.

I remember being a kid and wanting to learn to scuba dive so badly, but was never allowed to due to the cost it would entail especially if all 3 of us kids were to learn.  Growing up in Canada we had the good fortune of spending summers at my grandmother’s cottage on a lovely clear lake where I learned the expression:  “water-logged”.  We swam in the lake, went fishing, canoeing, water-skiing, and even sailing.  I loved to gaze into the water and imagine what was below.  My curiosity was endless when it came to what lay beneath the surface of the water.

As I grew older, I often looked into things like scuba clubs, but while at university, I had other priorities that put the scuba diving on the backburner again and again.  Instead I focused on non-profits and began my volunteer experience as the Trip Coordinator with Habitat for Humanity.  I learned about leadership, fundraising, and having fun while doing something meaningful and it finally started to lead me on some unforgettable international adventures to builds in Jamaica and Costa Rica.  Upon graduation from Wilfrid Laurier University at the age of 22 and with a Bachelor’s Degree in English Language & Literature as well as a minor in Development & International Studies, I packed up my bags for a dream-come-true-first-real-job adventure in the vast metropolis of Tokyo, Japan.  I was a brand spanking new English Teacher at a conversational school in a city of 13 million or so people who spoke a language I knew nothing about.  I had never even eaten sushi before or been on an airplane beyond Costa Rica.  I’ll never forget how I felt when my dad dropped me off at the airport in Toronto for my flight to Tokyo.  I had no idea what I was doing having never been to an airport by myself before let alone travelling across the world alone for a new job.

As strange as it might seem, Tokyo, Japan is where my scuba life began!

In my next blog post, I will write about the first time I tried scuba diving while on my first backpackers trip to the Philippines!

Have You Ever Seen These Crazy Scuba Dive Entries?

As many of you know I was working on the Explorer Ventures scuba dive liveaboard in the Turks and Caicos Islands in 2014-2015 and if you haven’t already done so (or know so), scuba liveaboards are the way to go in the world of scuba diving!  The Turks and Caicos Explorer II is a 125ft vessel that hosts a maximum of 20 scuba divers on 1 week trips where they eat, sleep, and scuba dive 5 times a day.  My job as both Dive Instructor and Purser on the ship was to assist divers in and out of the water 5 times a day (among a zillion other things!).

I did the math the other day and determined that on average, I assisted with and witnessed 540 boat dive entries a week (27 dives/week x 20 divers).   I also worked blocks of 12 weeks in a row, which equals 6 480 scuba dive entries every 3 month period!  On that note, I would like to declare myself an expert in the field of scuba dive entries!

You may think that entering the water from a boat as a scuba diver is pretty straight forward; however, I would like to admit that I have seen some pretty interesting and non-traditional entries on a regular basis.  In this blog I’ve decided to outline the most common types of entries as well as the ones that make me laugh on a daily basis.  Have I mentioned I love my job?

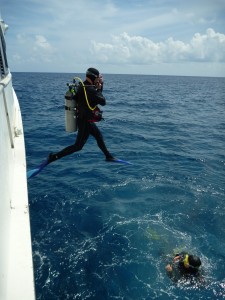
Perhaps a mini-briefing on scuba dive entries before I dive right in to the good stuff, which will be a great refresher for those who haven’t been in the water for awhile.  Depending on the type of boat you are using there are a variety of methods to get into the water and enjoy your dive.  Always inquire from your divemaster and/or captain as to the method that is used for each vessel.  During the PADI Open Water course you learn two types and possibly others depending on the region or conditions you are learning in.  One is called the Controlled Seated Entry, where you are sitting geared up on the edge of a platform (like a dock or edge of a boat) with your fins on your feet as they dangle in the water.  Then you twist your body to one side and place both hands on the edge next to you.  After that you simply need to continue to turn your body as you push away from the platform.  Although we teach this method and, in my opinion, it seems like a safe and easy method of entry, I can’t say I’ve really seen anyone use it outside of the training.  Not sure why…

The other method of entry we teach in the course and is the most common scuba dive entry I’ve seen, is called the Giant Stride Entry.  With all of your gear on, including fins, mask and regulator in your mouth, you take the palm of your hand (usually the right hand) and put it on your regulator while your fingers are on your mask.  This helps hold them in place when you hit the water.  Your other hand can do one of three things depending on you and your situation.  Originally you were told to hold the buckle of your weight belt, to avoid it from opening upon impact with the water.  But these days, most people are using integrated weights, so it isn’t necessary.  Instead,  what many of those divers do is gather their console and alternate and hold those with their other hand.  This avoids the potential for a dangling hose to be caught on something on the boat while you are dropping into the water.  The third option is what I recommend as I see masks slipping off all the time.  You should take your other hand and hold the back of your mask strap so it doesn’t slip off and you lose your mask once you hit the water.

Okay, so we’ve got one hand holding your regulator and mask in place and the other holding the back of your mask strap (or your weight belt, or your gauge), now you need to look straight out towards the horizon (try not to look down once you have checked that the area is clear).  When you are ready, you just need to take a step and you will have completed the Giant Stride Entry!  We tend to move in the direction we are looking, so by looking out at the horizon, you will step far enough away from the boat not to hit the back of your tank on the boat.  Don’t forget to signal to the boat that you are okay by putting your fist on your head or giving the okay sign with your hand.

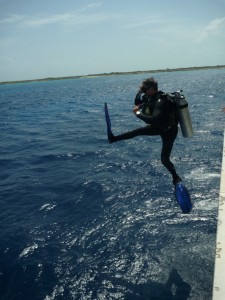
This is a fantastic example of a Giant Stride Entry off of the Turks and Caicos Explorer II in 2014.

A perfect example of a Giant Stride Entry

West Caicos, Turks and Caicos Islands

Okay, so now you know the standard, but what I really wanted to talk about here today are the out of the ordinary, extraordinary, where-did-they-come-up-with-that-technique, styles that I have put into 4 categories.  I’m not sure where these have evolved from, but I think they are ultimately the result of each scuba diver’s unique individual style…or lack of coordination!  Either way, they have provided me with an endless amount of amusement throughout my days on the boat!  For each scuba dive entry, I will rate it with a Splash Factor between 1 (not much splash) and 5 (big splash!).

The Torpedo

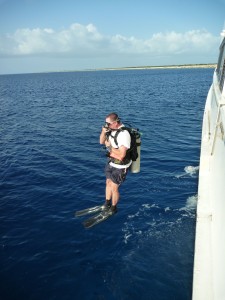
The first scuba dive entry I’d like to talk about is my favourite.  According to The Torpedo-ites, this style seems to have come about due to scuba diving in locations that have a significant drop between the platform and the water and/or a negative entry was required.  To perform this entry, the scuba diver approaches his exit point, steps off the platform and brings both feet together in one smooth action resulting in a streamlined entry like a torpedo plummeting straight into the water.  This tends to be a very clean and tidy entry with no flailing arms and dangling gear.  The Splash Factor is a 2!

This scuba dive entry is neat and tidy!  They enter the water just like a torpedo!

West Caicos, Turks and Caicos Islands

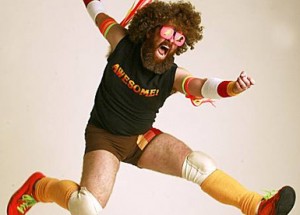
In a Guitar Hero's mind, this is how he thinks he looks!

Photo taken from the Air Guitar World Championships

Guitar Hero

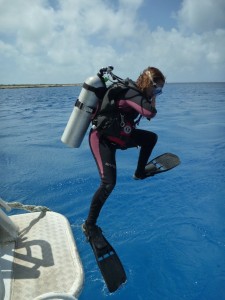
This type of scuba dive entry is super fun.  I’ve only ever seen men do it and it is reminiscent of those guys in your life who totally wish they were rock stars.  You know the types – they are the ones who are playing the air guitar like there’s no tomorrow.  Technically speaking, they are performing The Giant Stride Entry just as it says to do in the text book, but these guys have simply added some style.  They lift their leg just a little bit higher and reach for the stars as they leap from the vessel probably with some rockin’ AC/DC or Dire Straits internal playlist happening in their heads.  I’ll never forget the first one I ever saw by Mike Swisher and then more recently from Tim Tetlow!  Rock On Scuba Divers!!!  The Splash Factor is a 3!

Tim Tetlow - a true scuba diving Guitar Hero!

West Caicos, Turks and Caicos Islands

Froggy

This is one of those scuba dive entries that is so strange and unusual that the first time I ever saw it, I thought it was one of those once in a lifetime happenings.  I remember genuinely enjoying the show and shaking my head in wonder at all the funtastic things I get to see in my job.  But low and behold, The Froggy seems to be some strange, but common scuba dive entry.  Let me try to explain how one goes about doing this entry.  The diver will prepare himself as usual; approach the platform wearing fins, mask, regulator in mouth; and when they are ready and it is clear they will bend at the knee and spring up and outward bringing both legs up towards their chest as they jump out.  I feel fortunate that I was able to snap this fab photo because this is definitely the type of scuba dive entry that you need to see to believe it.  The Splash Factor is a 5!

The ultimate Froggy!

West Caicos, Turks and Caicos Islands

Free-Style

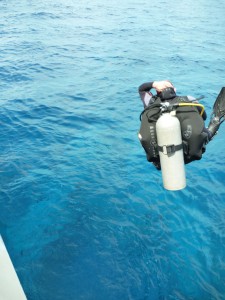
The Free-Style category is an anything goes division in the rating of scuba dive entries.  Some divers tend to be performers.  They like the attention and want to try things a little out of the ordinary and always with a touch of shock value added to the list.  I remember watching anxiously as this young girl did a flip in the air from the edge of the boat to the water wearing all of her dive gear.  I do not recommend that at all as it looked just like an accident waiting to happen!  I also remember this fantastic little bearded Russian man who would gently fall into the water like a tree that had just been cut down.  He’d rotate slightly in a log roll so he’d hit the water just right.  I wanted to yell “TIMBER!” every time he went for his dives.  We also had the pleasure of hosting Dave Smith and his dive shop, Blue Horizons Dive Center in Pennsylvania.  Dave is a performer too!  I was able to capture him doing an awesome cannon ball as his entry into the deep blue sea.  The Splash Factor is almost always a 5 for a Freestyler!

Dave Smith is a true Freestyler with his Cannon ball scuba dive entry!

West Caicos, Turks and Caicos Islands


So, what have we learned here?  There are a number of takes on the traditional Giant Stride Entry.  As long as  you are safe, the added style to each entry will generate giggles from your divemasters and dive buddies.  My personal favourite is to jump in and put my fins on while I’m underwater already.  I love the gentle free fall on my toes!  Please don’t hesitate to contact me if you have any questions about these or any other scuba dive entries!  Happy Hopping!

Some Musings on Scuba Diver Portrait Photography

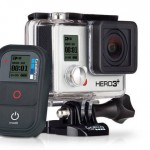
I love my new GoPro Hero 3 camera!

GoPro Hero 3

This week I bought my first underwater camera, which is the GoPro Hero 3 with all kinds of assorted add-ons including filters and a macro lens (I didn’t know GoPros had macro lenses!).  With my travels about to begin again, I sadly depart some beloved and talented dive buddies who have been so kind in sharing their incredible underwater photos on my website.  I recognized the need for me to possess a scuba dive camera that will be suitable (and affordable) as a compact travel companion able to document in HD quality the wonders of the ocean in photo as well as video.  That being said, although this is my first purchased camera, I do have some considerable exposure and experience to the art of underwater photography via my 1 year stint aboard the AquaCat scuba dive liveaboard in The Bahamas not to mention that photography class I took in high school (actually it helped a lot!).

Working on the liveaboard, I was responsible for shooting, editing, and displaying a photo CD for passengers to purchase.  The vessel provided all of the equipment (Nikon D80 SLR camera along with Ikelite housing and strobes) and I had some valuable insights from the talents of Captain Ron McCaslin whose underwater photography experience extended from the pre-digital age when photographs were taken with film and developed on the boat during the weekly trips.  How impressive!  He’s the one that taught me to “avoid the wave” when taking photos of divers. Waving is great for video, but a no-no in underwater photography.  I also had the opportunity to be advised by the super proficiency of Aleks Bartnicka who has been able to capture some of the most alluring and award-winning images I’ve seen to date.  In addition to my own personal training, I also paid special attention to the intense photographic fanaticism from the passengers.  At an average of 22 passengers each week over a year, that’s a lot of underwater photography lovers!

These days, virtually all scuba divers have entered into the realm of underwater photography.   With the advances in technology, underwater photography has been made much more accessible and the ability to produce quality photos even by non-professionals is within reach.  However, in spite of all this, the act of actually capturing those utterly illusive moments in nature is immensely challenging, highly addictive, and damn hard!  And if you are successful in capturing that moment and also are able to somehow portray the marine animal as possessing human-like characteristics, well, that’s just…Magic!

But do you want to know what’s even more difficult than trying to capture that perfect fish portrait?

How about a bigger challenge or maybe you are interested in dipping your toe (fin?!) into unchartered waters?  I would suggest you start taking some underwater photos of your scuba diver buddies!

I find it interesting that despite the fact that these days there are so many enthusiastic underwater photographers, there seems to be a lack of underwater photos of scuba divers.  Even more so because who doesn’t want a photo of themselves doing such a cool thing like scuba diving?!

Thinking about my own personal experiences of taking photos of the passengers on the liveaboard and of attempting to be an underwater scuba diver super model, I can see two main reasons why scuba diver portraits are not in the mainstream of underwater photography.

Claudio of Coral Reef Divers in Cabo Pulmo, Mexico taking an underwater "selfie"

La Sirenita, Cabo Pulmo, Mexico

First and foremost, it is virtually impossible to take an underwater “selfie”.  Well, not impossible, but depending on your camera, it’s not as easy as on the surface to reach around and press “click”.  Those buttons on underwater camera housings require a good and steady push in order to capture those magic underwater moments.  My fingers don’t always bend that way.

I’d love to see your attempts at underwater “selfies” so please send me your snaps and I’ll post them on my Facebook page!

The other main reason I see as to why there isn’t an abundance of underwater scuba diver portraits lies in the fact that if we can’t take a selfie, we’ll need to get someone to take our picture for us.  That means either convincing our dive buddy to devote his entire underwater time to being our personal photographer or hiring a professional.  I’m not sure about you, but I don’t have a lot of scuba dive buddies who are interested in doing that!

While working on the liveaboard, I was aptly advised to take as many photos of the passengers themselves for exactly that reason.  Finally these divers would be given the opportunity to possess photos of them while they keenly chased after turtles, rays, and colourful fish with their own cameras.  And for me, well, I certainly had some…let’s just say “interesting” experiences that taught me a thing or two about underwater scuba diver portraits that may be of interest to you if you are venturing into this challenging avenue of photography.

It’s funny when you think about it for a moment, as a scuba diver diving underwater one can feel so…angelic…floating and feeling so effortless.

But as soon as you ask a diver to pose for a picture underwater all kinds of strange things happen!

Buoyancy – Gone.  When you point a camera at a diver, they will most definitely float, sink, stir up dust, bump into overhangs.  Suddenly they have no sense whatsoever of what their bodies are doing!  I’ve seen it all.

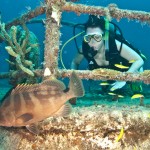
Your best bet is to prep your underwater model before the dive.  Tell them how you would like to see them and how you will communicate with them so that you can get the shot you are looking for.  For example, I always want to take photos of scuba divers and a cool animal underwater.  It’s so frustrating to have a scuba diver there looking at the animal and not taking a moment to look up and into the camera for that awesome waiting shot.  The best positions for your underwater model will be in a horizontal pose, fins behind, all gear streamlined (i.e. nothing dangling) and either arms crossed or wide open depending on what you want to convey.  Tell your underwater model to pay attention to their buoyancy during photo taking and to be aware of their body positioning.  If you’ve mastered the art of positioning, you should then take it to the next level and ensure that with every scuba diver portrait there is a nice marine animal with him or her in the photo.  Take a look at this awesome photo of myself in my early days of diving while on a scuba adventure in The Maldives.  Can you say “Awkward”!!??  The next one is of a very talented diver who seemed to immediately strike some awkward pose as soon as the camera was pointed in his direction (wasn’t there a Friends episode about this with Chandler??!!).  I’ve also included one of my favourite scuba diver portraits I took of the lovely Laura who enjoyed the groupers on The Austin Smith wreck in The Bahamas.

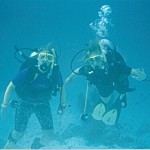
Point a camera at a diver and watch them go from graceful o awkward!

Kandooma, South Male Atoll, Maldives

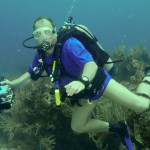
Do your best to keep yourself streamlined and horizontal when posing for a photo

Danger Reef, Exumas, The Bahamas

Ideally you will want your scuba diver portrait to include some marine life in addition to the diver

The Austin Smith Wreck, Exumas, The Bahamas


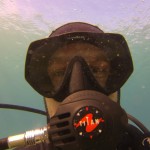
Facial expressions – Blank.  The wonder and amazement that we express when we are out of the water often evaporate.  It’s as if the diver feels the mask and regulator is hiding their face, but in fact the mask and eyes are what draw us into a solid scuba diver portrait!  I once showed a non-diver friend some of my photos and he remarked, “Wow, those scuba dive masks sure don’t make a person look attractive, do they?”  I beg to differ, but I could be biased in thinking that any piece of scuba dive equipment is sexy…

I always tell my divers to smile with their eyes and/or to think of something funny and it definitely makes a big difference.  Tell your model to smile even with the regulator in their mouth because it will be reflected in their eyes.  If the diver feels comfortable, they can even remove the regulator from their mouth for a nice natural smile, but be sure to advise the model to point the mouthpiece of the regulator down so bubbles don’t free-flow and ruin the photo.  I also really think that scuba dive masks with the clear skirt make better facial portraits than the dark ones, but I think that’s just a matter of opinion.  Look at the differences in these photos.  The contentment in the eyes of Thiago on the left completely draws you into the photo whereas the blank stare from the woman on the right creates a stale, uninviting photo despite the excitement of the sharks!

A scuba diver's eyes are the key to a successful scuba diver portrait

Danger Reef, Exumas, The Bahamas

Think of something funny and smile with your eyes to create an engaging portrait photo

Split Coral Head, Eleuthera, The Bahamas


Enter Mr/Mrs Bubble-Face.  As we all know, the number one rule of scuba diving is to never hold your breath, but an awareness of your breathing is essential in underwater scuba diver portrait photography.  And timing your breaths with the taking of a photo is vital to avoid the inevitable bubble-face syndrome!  Again, just communicate with your underwater model prior to the dive and remind them to time their breathing.  This photo of me was taken during my PADI Open Water Diver course in Guam and take a look at this funny photo of a scuba diver I took during a shark feed dive in The Bahamas.  One breath of bubbles can make or break a photo!

Hello Mrs. Bubble-face!

Mia's PADI Open Water Diver course in Guam 2001

Hello Mr. Bubble-face!

Split Coral Head, Eleuthera, The Bahamas


Here Comes The Sun. This is the easiest mistake to fix and it’s the same on land so nothing really technical about this one.  Simply an awareness of where the sun is will enable you to create a great photo even without strobes.  The sun should always always always be at the photographer’s back.  It’s helpful if your model also knows this simple rule, so that he/she may position themselves in the appropriate location.  Take a look at this photo our dive guide took of Justin and me on Justin’s PADI Discover Scuba Diving experience on my latest trip to Mexico.  Could have been a lovely portrait, but the light behind us created shadows right across the most important part of a scuba diver portrait – the eyes!  I think we were too excited about his first dive to pay attention to where the sun was!

Always remember to keep the sun BEHIND the photographer's back otherwise you end up with shadows over the face of your underwater models.

La Sirenita, Cabo Pulmo, Mexico

An underwater photo shoot to boot in Curacao!

Recently I had the opportunity to view some incredible photos by some former scuba dive colleagues of mine who are now working and living in Curacao.  Leticia Duran and Arne Richter own and operate Turtle and Ray Productions over there and ran an incredible photo shoot with Erin R of A Munchkin Abroad.  I really hope to see more of these types of photos from them in the future!


Stunning photos by Turtle&Ray Productions featuring underwater models.

Turtle&Ray Productions, Curacao

On that note, I look forward to seeing some new and improved underwater scuba diver portraits!  I really do love those beautiful underwater creatures, but why not explore a new challenge and snap some shots of your buddy!  Send me your favourite underwater scuba diver portraits! I want to see them!


Part 4 – From Tank to Breath of Fresh Air: The Journey!

Air, air, everywhere!  I think it’s interesting to meet divers and non-divers of various levels and to listen to their interpretations of how scuba functions.  I can’t tell you how many people refer to breathing the air from their tank as “breathing oxygen”, which is incorrect.   In this section of the 5 part series on air and its relationship to diving, I’d like to offer a summary of what actually happens when you take a breath through a regulator underwater!  If you’d like some other insights into air and its relationship to diving, please check out the other parts of my series here:

Understanding Air and its Relationship to 5 Key Areas in Scuba Diving

Part 1 – BCD Air Inflation/Deflation and Buoyancy: A Balancing Act!

Part 2 – Equalizing Your Ears: Let’s Get Popping!

Part 3 – Equalizing Your Mask: Don’t Squeeze Me!

Part 5 – Your Lungs & Scuba Diving:  Easy Breezy Breathing!

Air and the Scuba Tank

Before I begin, here’s a little information about the air that is in your scuba tank.  First of all, the air that we breathe underwater, is the exact same as what we breathe on land (21% oxygen, 79% nitrogen); the only difference is that it is compressed to fit inside a tank.  You may have heard divers talking about the size of their tanks:  80 cubic feet/ 12L; 63 cubic feet/ 10L; 100 cubic feet/ 15L; but, what exactly are these numbers referring to?

In the metric world, divers refer to the size of their tank based on the internal volume, for example, as if it was filled with water.  When we talk about a 15L, 12L, or 10L tank, it is with reference to how much water it can hold.  In fact, it actually holds 2265L of compressed air to a working pressure of 3000psi/210bar.  Considering the average person is breathing about 12L per minute on the surface while at rest, it’s good to know that there is more than just 12L of air in your typical tank!

In the imperial world, divers also refer to the size of their tank based on the internal volume, although they make reference to the capacity it has to hold compressed air to a working pressure of 3000psi/210bar as opposed to how much water it can contain.  So, you may hear a person refer to a standard tank as an 80, which means it can hold 80 cubic feet of air (the equivalent to 2265L).
So now we know that the air inside a scuba tank is the same as the air that surrounds us only that it is compressed to fit into a small container.  Just like a little backpack of air!  We also know how much air a typical scuba tank is able to hold.  What’s next?

How does the compressed air in your tank become the air you breathe underwater?  As you may remember from your scuba diving training, your regulator system is made up of 2 stages:  The First Stage, which is the part you attach to your tank and the Second Stage, which is what you breathe from (otherwise known as the Regulator and Alternate).  If you remember from my previous blog on air, as you go underwater, the air becomes denser; however, the air that’s protected by the walls of your tank is not affected by the increasing pressure underwater.  It stays the same.

The First Stage

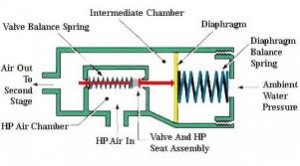
If there was no First Stage, the air that came out of your tank would come out with a big blast because the contents are compressed into a small space.  So, to control the amount of air released every time

First Stage Balanced Diaphragm Diagram

First Stage Balanced Diaphragm Diagram

you take a breath, the regulator mechanism reduces the pressure in 2 stages.  Imagine your First Stage in 3 distinct, but interconnected parts.  All of the chambers are connected via a valve running from the first chamber through the second and attached to a rubber diaphragm, which separates the second from the third with a spring connected to the diaphragm in chamber 3.  Let’s look at each chamber individually:  We’ll call the first “The High Pressure Chamber” (Chamber 1).  This one is filled with high pressure air delivered directly from the tank when you turn it on.  It remains closed via the valve until you inhale.  The next chamber, which your regulator hose is attached to, will be called “The Intermediate Pressure Chamber” (Chamber 2).  This one is filled with intermediate pressure air as well as having a very cool relationship with the final chamber, which we’ll call “The Water Chamber” (Chamber 3).    Chamber 3 is filled with water, which mirrors whatever surrounding pressure you are at; whether you are at the surface, 30ft/9m down, or 100ft/30m down.  The surrounding pressure from Chamber 3 determines the intermediate pressure found in Chamber 2.  This is done via the rubber diaphragm.  So, those are your 3 compartments, now let’s see what happens when you inhale!  By taking a breath, we remove air from Chamber 2, thus reducing the intermediate pressure and causing the water in Chamber 3 to apply force onto Chamber 2 via the diaphragm.  But never fear!  This push opens the valve to Chamber 1, releasing a fresh batch of high pressure air and filling Chamber 2 until it is back to the surrounding pressure which pushes the diaphragm back to normal.

Woo Hoo!  Isn’t air and pressure cool?

The Regulator and Alternate

Alright, so we have got the high pressure air from your tank reduced to intermediate pressure in the First Stage, what happens once it gets to your regulator?  When the air arrives at your regulator, the pressure is reduced a second time (hence the name “second stage”) to the surrounding pressure.  The mechanism inside the regulator is actually quite simple.  Underneath the plastic cover you can find a rubber diaphragm which is attached to a little lever that acts like a valve to allow or stop air from the hose.  Underneath the plastic cover, you can find the exhaust where the bubbles go out when you exhale.  When you breathe in, the surrounding pressure is reduced inside the regulator, so the water pressure pushes in on the diaphragm, which releases the lever allowing air to flow in through the mouthpiece and into your lungs!  When you exhale, the surrounding pressure inside the regulator is increased, which pushes the diaphragm out and allows the lever to close the valve and opens the exhaust valve to allow the air to escape.  Pretty neat, eh?

Mia’s Recommendations

There are so many different brand names and a few different innovative features, but ultimately regulators and first stage systems are virtually the same.  If you plan to dive in cold water, you will want to ensure that the First Stage has some kind of environmental dry sealing feature to prevent the Chamber with water inside from freezing.

Some regulators will come with a “sensitivity” lever called a venturi switch which you can set to low (-) while on the surface to avoid free flows when the regulator is not in your mouth and resting on the surface of the water;  or set to high (+) while diving which is supposed to allow for ease of breathing.  In my experience, I always set this feature to low and divers who are relaxed underwater never experience difficulty breathing on that setting.  Sometimes I wish that setting didn’t even exist due to the amount or air lost through free-flows on the surface!  It’s not really needed, in my opinion.

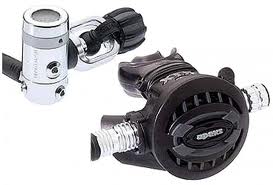
Apeks XTX50 First Stage and Regulator

Apeks XTX50 First Stage and Regulator

The First Stage I use is the first one I ever bought back in 2007 and is an Apeks, by Aqua Lung, which has a reputation for being a good quality cold water diving system while perfectly good in warm waters as well.   The regulator itself is a low end (and super!) XTX50, which has served me well for all the diving I’ve done over the last couple years.


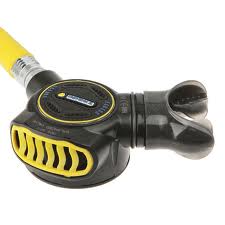
Apeks Egress Alternate Regulator

Apeks Egress Alternate Regulator

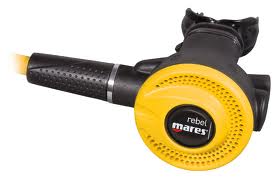
Mares Rebel Alternate

Mares Rebel Alternate

As for the Alternate, at the moment I am using a Mares Rebel, which replaced my Apeks Egress.  I decided to switch from the Egress to the Rebel mostly for teaching purposes.  The Egress can be used with the mouthpiece inverted or not, whereas, most regulators only function with the mouthpiece up (otherwise water enters in).  This is definitely a useful function for recreational divers; however, since I was teaching and wanted to represent the most common type of alternate, I decided to switch.

Definitely let me know if you have any questions or comments simply by sending me a message via my Contact Mia page.  Feel free to enjoy my other blogs on Understanding Air and Its Relationship to 5 Key Areas of Scuba Diving, Part 1 – BCD Air Inflation/Deflation and Buoyancy: A Balancing Act!, Part 2 – Equalizing Your Ears: Let’s Get Popping!, Part 3 – Equalizing Your Mask: Don’t Squeeze Me! And finally, Part 5 – Your Lungs & Scuba Diving:  Easy, Breezy, Breathing!

Happy Diving!

Part 1 – BCD Air Inflation/Deflation and Buoyancy: A Balancing Act!

If you haven’t already done so, take a look at my introduction to Understanding Air and its Relationship to 5 Key Areas to Scuba Diving prior to reading this post to give yourself some quick and helpful background information!  In this post I will discuss the BCD, its correlation with air, some helpful tips, and then my personal equipment recommendation.  If you enjoy this article – let me know and stay tuned for the next 4 posts on how Air relates to Ears, Mask, Tank & Octopus, and your Lungs & Breathing!

The first specific area I’d like to talk about is the BCD or Buoyancy Control Device.  Divers wear this piece of equipment, which contains a bladder to hold air, like a jacket or vest.   Your BCD is connected to the air in your tank via the “Low Pressure Inflator Hose”.  It is also equipped to be “orally inflated” should there be a problem with the mechanism to add air from the tank.  You do this by blowing into the hose while holding down the deflate button (which opens the valve to allow air in/out).

Before you jump in the water you always make sure your BCD is partially inflated so that you can float on the surface.  When you are ready to go underwater you raise the Low Pressure Inflator Hose high above your head and release all the air from the BCD and exhale slowly, which also releases air from your lungs to assist in your descent.  As you come close to the bottom or the depth that you want to stay at, you will usually need to add some air into the BCD to prevent you from continuing down or hitting the bottom.

This tends to take a few dives as you learn the balancing act of how much air will maintain your general position at a certain depth.  Remember, the air that is put into your BCD is also affected by the pressure and becomes increasingly more (and less!!) dense depending on your depth.  That means that the amount of air you need to maintain neutral (neither sinking nor floating) buoyancy at 10m/32ft will be different than what you put in at 23m/75ft, for example.  This also means that when you change your depth by swimming over a reef or to a shallower depth, you must make adjustments to the amount of air inside the BCD by releasing air – even if you didn’t add any more air to it!!

This happens because just as going deeper causes the air to be more dense, ascending (even just a metre or 3 feet) will cause the air to expand and make your BCD fuller causing you to float upwards  until you release the air, which results in a balance of just enough air inside the BCD to achieve neutral buoyancy at that specific depth.  This is a kind of balancing act that at first takes some thought and will later become second nature to you.  Remember this important point – Upon ascent, consider that the air already inside your BCD will expand, so pay attention to your positioning and if you begin to float upwards.  Be prepared to release the air to balance it out and to avoid an uncontrolled ascent.

Mia’s helpful tips!
1.    Before diving and during your pre-dive equipment check, with the air turned on, practice putting air into the BCD and taking it out (inflate and deflate).  Sometimes it can be confusing when using rental gear on which button is which.  You can also practice orally inflating.
2.    While underwater, if you are trying to locate your Low Pressure Inflator Hose to inflate/deflate, always remember:  “If I touch my LEFT BOOB, I will find it!!!”  Anyone want to admit to trying to deflate their snorkel at some point of their diving career!!!???
3.    Having trouble deflating?  Air will always stay at the highest point as it rises.  If you are in a horizontal position, slightly head-first, that means the air could be sitting in the bottom part of your BCD as your bum will be higher than your shoulders.  Try to make it easy for the air to escape from your Inflator Hose by:
a.    Always raise the hose as high above your head as possible.
b.    Sometimes you can even adjust your positioning in the water from horizontal to momentarily vertical to further assist the escape of air from the Inflator hose as you reach up.

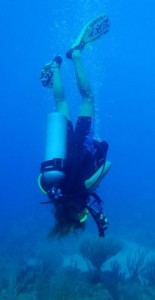
Mia Diving Upside Down

In a head-first position, use a dump valve to release air

c.    If for some reason you are head-first and your fins are high above you, this means any air in your BCD will actually be in the bottom of your jacket.  Most BCDs come with a “Dump valve” to release air from a head-first position underwater.  Feel around the bottom edge of your BCD for the cord and a little tug should allow a burst of air to escape.
4.    Little by Little!  Try to avoid the up and down ping-pong effect by thoughtfully inflating/deflating only a little, waiting for a result and then repeating as necessary.  As a beginner diver learning this fancy balancing act called buoyancy, stay calm if you feel yourself floating up upon ascent.  Remember to exhale completely as you release just a puff of air.  Many divers have felt a quick twinge of panic at floating up and proceed to do a big dump of air causing them to drop back down, but too quickly and beyond their intended neutral zone into a “negative buoyancy” (sinking).  This results in more fiddling of inflating again to achieve the comfortable hovering position.
5.    Make a commitment to get to know yourself!  Adding air to your BCD is not something you should typically be doing throughout the entire dive.  Remember that your buoyancy is not only controlled by your BCD, but ALSO by your breathing.  Make a commitment that on each dive once you achieve neutral buoyancy (neither sinking, nor floating) at a depth you will stay at for awhile, practice using your breathing to adjust your position in the water.  Refer to the post on your Lungs & Breathing blog to come in a few weeks!  Buoyancy is something that you will practice over and over again and WILL get!  Have patience, get familiar with your BCD and enjoy!

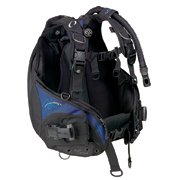
Mia BCD Oceanic Hera

Mia's favourite BCD - the Oceanic Hera

Mia’s BCD Recommendation!

The BCD I use now and absolutely love is called the “Hera” by Oceanic and created specifically for women.  It is both a jacket style and rear inflation form, which I love because I am stable in both horizontal and vertical positioning without back weights (although pockets for back weights are available if I want).  It also has a ton of sturdy D rings to attach my Alternate Air Source and attach my Surface Marker Buoy alongside big pockets to store a slate or some yucky plastic bottle I find underwater and want to put in the trash.  Before the “Hera” I used the Seaquest “Diva” for many years and loved, but I decided against the newer version of this due to my desire to leave rear-inflation styled BCDs and the lack of pockets and D-rings.  Sorry Diva you were good, but time to move on!

Feel free to send me a message via Contact Mia if you have any questions regarding this topic.  If you “Like” it make sure you let me know on my Facebook page DiveWithMia!

Happy Diving!

DiveWithMia.com