Part 4 – From Tank to Breath of Fresh Air: The Journey!

Air, air, everywhere!  I think it’s interesting to meet divers and non-divers of various levels and to listen to their interpretations of how scuba functions.  I can’t tell you how many people refer to breathing the air from their tank as “breathing oxygen”, which is incorrect.   In this section of the 5 part series on air and its relationship to diving, I’d like to offer a summary of what actually happens when you take a breath through a regulator underwater!  If you’d like some other insights into air and its relationship to diving, please check out the other parts of my series here:

Understanding Air and its Relationship to 5 Key Areas in Scuba Diving

Part 1 – BCD Air Inflation/Deflation and Buoyancy: A Balancing Act!

Part 2 – Equalizing Your Ears: Let’s Get Popping!

Part 3 – Equalizing Your Mask: Don’t Squeeze Me!

Part 5 – Your Lungs & Scuba Diving:  Easy Breezy Breathing!

Air and the Scuba Tank

Before I begin, here’s a little information about the air that is in your scuba tank.  First of all, the air that we breathe underwater, is the exact same as what we breathe on land (21% oxygen, 79% nitrogen); the only difference is that it is compressed to fit inside a tank.  You may have heard divers talking about the size of their tanks:  80 cubic feet/ 12L; 63 cubic feet/ 10L; 100 cubic feet/ 15L; but, what exactly are these numbers referring to?

In the metric world, divers refer to the size of their tank based on the internal volume, for example, as if it was filled with water.  When we talk about a 15L, 12L, or 10L tank, it is with reference to how much water it can hold.  In fact, it actually holds 2265L of compressed air to a working pressure of 3000psi/210bar.  Considering the average person is breathing about 12L per minute on the surface while at rest, it’s good to know that there is more than just 12L of air in your typical tank!

In the imperial world, divers also refer to the size of their tank based on the internal volume, although they make reference to the capacity it has to hold compressed air to a working pressure of 3000psi/210bar as opposed to how much water it can contain.  So, you may hear a person refer to a standard tank as an 80, which means it can hold 80 cubic feet of air (the equivalent to 2265L).
So now we know that the air inside a scuba tank is the same as the air that surrounds us only that it is compressed to fit into a small container.  Just like a little backpack of air!  We also know how much air a typical scuba tank is able to hold.  What’s next?

How does the compressed air in your tank become the air you breathe underwater?  As you may remember from your scuba diving training, your regulator system is made up of 2 stages:  The First Stage, which is the part you attach to your tank and the Second Stage, which is what you breathe from (otherwise known as the Regulator and Alternate).  If you remember from my previous blog on air, as you go underwater, the air becomes denser; however, the air that’s protected by the walls of your tank is not affected by the increasing pressure underwater.  It stays the same.

The First Stage

If there was no First Stage, the air that came out of your tank would come out with a big blast because the contents are compressed into a small space.  So, to control the amount of air released every time

First Stage Balanced Diaphragm Diagram

First Stage Balanced Diaphragm Diagram

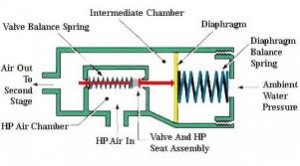
you take a breath, the regulator mechanism reduces the pressure in 2 stages.  Imagine your First Stage in 3 distinct, but interconnected parts.  All of the chambers are connected via a valve running from the first chamber through the second and attached to a rubber diaphragm, which separates the second from the third with a spring connected to the diaphragm in chamber 3.  Let’s look at each chamber individually:  We’ll call the first “The High Pressure Chamber” (Chamber 1).  This one is filled with high pressure air delivered directly from the tank when you turn it on.  It remains closed via the valve until you inhale.  The next chamber, which your regulator hose is attached to, will be called “The Intermediate Pressure Chamber” (Chamber 2).  This one is filled with intermediate pressure air as well as having a very cool relationship with the final chamber, which we’ll call “The Water Chamber” (Chamber 3).    Chamber 3 is filled with water, which mirrors whatever surrounding pressure you are at; whether you are at the surface, 30ft/9m down, or 100ft/30m down.  The surrounding pressure from Chamber 3 determines the intermediate pressure found in Chamber 2.  This is done via the rubber diaphragm.  So, those are your 3 compartments, now let’s see what happens when you inhale!  By taking a breath, we remove air from Chamber 2, thus reducing the intermediate pressure and causing the water in Chamber 3 to apply force onto Chamber 2 via the diaphragm.  But never fear!  This push opens the valve to Chamber 1, releasing a fresh batch of high pressure air and filling Chamber 2 until it is back to the surrounding pressure which pushes the diaphragm back to normal.

Woo Hoo!  Isn’t air and pressure cool?

The Regulator and Alternate

Alright, so we have got the high pressure air from your tank reduced to intermediate pressure in the First Stage, what happens once it gets to your regulator?  When the air arrives at your regulator, the pressure is reduced a second time (hence the name “second stage”) to the surrounding pressure.  The mechanism inside the regulator is actually quite simple.  Underneath the plastic cover you can find a rubber diaphragm which is attached to a little lever that acts like a valve to allow or stop air from the hose.  Underneath the plastic cover, you can find the exhaust where the bubbles go out when you exhale.  When you breathe in, the surrounding pressure is reduced inside the regulator, so the water pressure pushes in on the diaphragm, which releases the lever allowing air to flow in through the mouthpiece and into your lungs!  When you exhale, the surrounding pressure inside the regulator is increased, which pushes the diaphragm out and allows the lever to close the valve and opens the exhaust valve to allow the air to escape.  Pretty neat, eh?

Mia’s Recommendations

There are so many different brand names and a few different innovative features, but ultimately regulators and first stage systems are virtually the same.  If you plan to dive in cold water, you will want to ensure that the First Stage has some kind of environmental dry sealing feature to prevent the Chamber with water inside from freezing.

Some regulators will come with a “sensitivity” lever called a venturi switch which you can set to low (-) while on the surface to avoid free flows when the regulator is not in your mouth and resting on the surface of the water;  or set to high (+) while diving which is supposed to allow for ease of breathing.  In my experience, I always set this feature to low and divers who are relaxed underwater never experience difficulty breathing on that setting.  Sometimes I wish that setting didn’t even exist due to the amount or air lost through free-flows on the surface!  It’s not really needed, in my opinion.

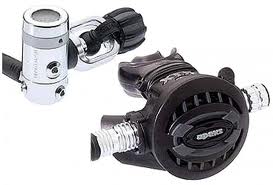
Apeks XTX50 First Stage and Regulator

Apeks XTX50 First Stage and Regulator

The First Stage I use is the first one I ever bought back in 2007 and is an Apeks, by Aqua Lung, which has a reputation for being a good quality cold water diving system while perfectly good in warm waters as well.   The regulator itself is a low end (and super!) XTX50, which has served me well for all the diving I’ve done over the last couple years.


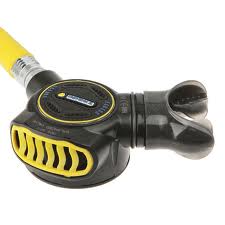
Apeks Egress Alternate Regulator

Apeks Egress Alternate Regulator

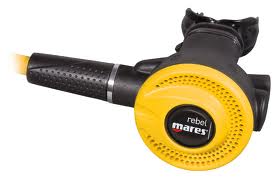
Mares Rebel Alternate

Mares Rebel Alternate

As for the Alternate, at the moment I am using a Mares Rebel, which replaced my Apeks Egress.  I decided to switch from the Egress to the Rebel mostly for teaching purposes.  The Egress can be used with the mouthpiece inverted or not, whereas, most regulators only function with the mouthpiece up (otherwise water enters in).  This is definitely a useful function for recreational divers; however, since I was teaching and wanted to represent the most common type of alternate, I decided to switch.

Definitely let me know if you have any questions or comments simply by sending me a message via my Contact Mia page.  Feel free to enjoy my other blogs on Understanding Air and Its Relationship to 5 Key Areas of Scuba Diving, Part 1 – BCD Air Inflation/Deflation and Buoyancy: A Balancing Act!, Part 2 – Equalizing Your Ears: Let’s Get Popping!, Part 3 – Equalizing Your Mask: Don’t Squeeze Me! And finally, Part 5 – Your Lungs & Scuba Diving:  Easy, Breezy, Breathing!

Happy Diving!
Part 3 – Equalizing Your Mask: Don’t Squeeze Me!

The third part in the scuba dive relationships with Air discusses the impact that air has on our masks at depth.  If you haven’t done so already, take a look at my briefing on how air is affected underwater to give you some background information first.

Have you ever wondered why scuba divers can’t use swimming goggles for diving?  Well, there is a very important reason that relates to air and pressure.  Your dive mask covers your eyes as well as your nose (unlike swim goggles) because just like the air space in your ears/sinuses, the air inside the mask becomes denser as you go underwater.  As the air becomes denser inside the mask, it pushes up against your face like a suction cup.  We need to achieve the same goal as with the ears and BCD – maintain a normal amount of air inside the airspace and we do this by pushing air into the space through our nose and into the mask and letting air escape as it expands.  This is called “equalize the mask”.

Mask Squeeze

Sometimes (not all times), if we forget to blow air out our nose and into the mask upon descent, we may end up with a “Mask Squeeze”.  This happens when the mask suctions onto your face so tightly that it bursts some blood vessels leaving a lovely bruise ring around your eyes, perhaps a black eye or two, or more commonly, bloodshot eyes!  This is very easily avoided by giving a puff or two out the nose as you go down.  Don’t worry about expanding air in your mask as you ascend because the air will naturally escape through the skirt of your mask .

Mia’s Helpful Tips!

  1. To select a properly fitting mask, place the mask on your face without putting the strap around your head.  Breathe slightly in through your nose.  If the mask does not fall off your face and you don’t hear or feel any air being sucked in around the skirt – You’ve got a good fit!
  2. If you tend to be a ‘nose-breather’, an exercise you can try in order to train yourself is to wear your mask while you are out of the water (around the house!).  Open your mouth to breathe in and then close it to exhale through your nose.  You will notice the mask popping off your face just a little and the air escaping easily just beneath the skirt of your mask.

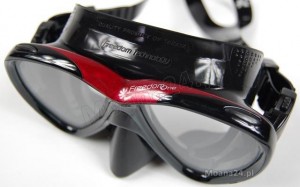
Tusa Freedom One Scuba Dive Mask

Mia’s Dive Mask Recommendation!

The mask I am using at the time I wrote this article is called the Freedom by Tusa.  It has an exceptionally soft skirt, a lovely field of vision, and if you have any interest in liberating yourself from unattractive goggle-y eyes – this mask definitely tops the sexy list!


Feel free to send me a message via Contact Mia if you have any questions regarding this topic and definitely check out the other articles in this 5 part series including Understanding Air, Your BCD, and Equalizing Your Ears and Sinuses, Your Tank and Regulator, and Your Lungs & Breathing.  If you “Like” it make sure you let me know on my Facebook page DiveWithMia!


Water Slide Review at the Atlantis Resort in the Bahamas!

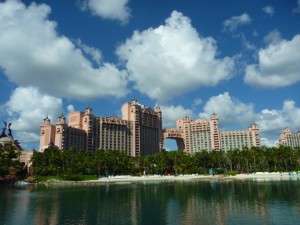
The Atlantis Resort, Paradise Island, the Bahamas

In September 2012, I spent 3 days at the famous Paradise Island, Atlantis Resort in the Bahamas.  This is a unique hotel resort experience because it consists not only of the lavishness commonly found in this type of setting with stunning rooms, amenities, beaches, restaurants, and views; however, the Atlantis Resort stands out among its peers due to the fact that it also includes an extensive aquatic theme park which is included within the price of the stay of the hotel.  20 million gallons of water, 141 acres, 11 pools, 8 waterslides and 2 river tubing rides alongside aquarium glass tunnels, open lagoons filled with animals, and floor to ceiling windows featuring Reef Sharks, Manta Rays, Nassau Groupers, Jelly Fish, Lobster, and one of the most famous Bahamian animals the Conch!

From all of the countless features of this resort, I decided to focus on the Aquaventures water park.   And being the funny girl I am – strangely attracted to the thrilling, but ultimately satisfied with easy-going rides, here are my personal insights into each waterslide!

There are 2 areas in the Aquaventure water park with each section being home to 4 different waterslides.  To access the waterslides, you will need to find a Towel Hut and swipe your room key, so they can give you a bracelet.  My best advice, with regards to any pre-waterslide preparation, is to leave all money, watches, jewellery and anything of value in your room, otherwise you will have no choice but to leave it on a poolside lounger or rent a locker for a minimum of 7USD/day while you romp and play in the water.

Cool tunnel at the end of The Serpent waterslide

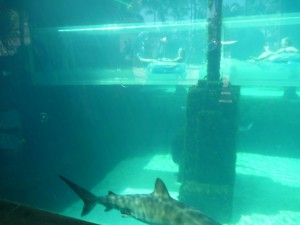
The first water playground we encountered was at The Mayan Temple.  There you will find 4 fun waterslides, one of which (and my personal favourite), requires a tube that you get prior to climbing the stairs to the top.  The Serpent takes you through an enclosed chute, first into darkness, then from side to side and finally down through a transparent tube.  The coolest part is that it runs straight through a huge aquarium full of sharks you can see from the safety of the ride and then tosses you out on the other side!  Fun!


The other 2 slides at the top of The Mayan Temple are for true thrill seekers.  You can choose between the super speedy 60 foot drop at a virtual 90 degree angle down on The Leap of Faith or The Challenger, which you and your friend can race down side by side to see who goes the fastest or the farthest with a heart-stirring bounce part way through!  Both are open air slides.

The other slide on The Mayan Temple is called The Jungle and I would call a more traditional style of slide.  It is open air and swishes you from side to side through mountainous terrain and drops you into a lovely pool of water.  This would be the tamer of the four slides, but still ignites a squeal of laughter or two along the way!

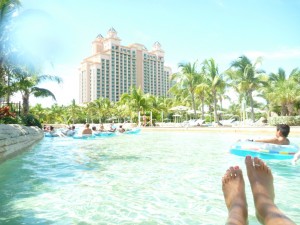
The Current river tubing ride

After The Mayan Temple why not make your way over towards The Power Tower, which is home to a great mile long tube ride called The Current.  The highlight of this river ride would definitely be the waves that rush you along as well as the route towards the end (stay to the left!) called “The Rapids”, which tumble and spin you every which way.  If you veer to the right instead, you will get the opportunity to do one of 2 super fun water slides with your tube, either The Drop or The Falls.  You will be directed onto a big elevator that will click clack your way to the top.  I tried The Drop and enjoyed the thrilling plummet and butterflies as I was sloshed about the tunnel!

The most exciting, thrilling, and scary waterslide, in my opinion, is atop The Power Tower and called The Abyss!  Even just climbing to the top is worth the 360 degree view of the ocean and resort, but don’t be surprised (or deterred!) if you hear both men and women scream as they drop down the dark tunnel.  Because the drop straight down at top speed with rushing water beneath you couldn’t be intense enough, why not ensure you are surrounded by pitch blackness!   Eeeek!  However, my favourite part of The Abyss is the ending (oddly enough) when it spits you out into a cave with 2 beautiful aquariums built into the walls – very cool!  Now, for a different kind of thrill, take a tube all the way back to the top of The Power Tower and enjoy a wild outdoor drop down The Surge and then twisty-swirly fun through rapids along the way!  Make sure you do what they tell you and don’t drag your bum and watch your toes as your tube gets bounced around!

The Dig

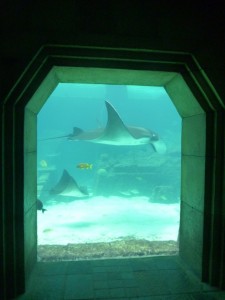
If waterslides are not your calling, I would like to highly recommend a fascinating presentation of the mythical civilization called Atlantis that, according to Plato, was destroyed by earthquakes and a tidal wave and rests below the surface of the ocean some 11 000 years ago!  Leisurely stroll through The Dig and enjoy this stunning aquarium; view the giant Manta Rays gracefully “fly” by or admire the striking Spotted Eagle Rays with their unique expressions and impressive formations.  You will also never forget the extraordinary Green Morays mouthing underwater words to you, the scrawling Lobster tank, and magnificent swimming Sea Horses and more!

All in all, I had a great time exploring even just a fraction of what Atlantis has to offer.  The only thing I found challenging was affordable eating and drinking options since the resort is not, in fact, a traditional all-inclusive.  You can make use of the convenience store across the street to purchase things like water, snacks, and alcoholic beverages to help with this.

I thoroughly enjoyed the Atlantis Aquaventure water park and all of its amazing animal creatures.  This is well worth a fun-filled day pass and a cool add-on feature at a luxury resort!

In front of the Beach Towers and Green Turtle pond